0

Happy Apocolypse!

Here’s hoping that 2012 brings you and yours all the happiness in the world!
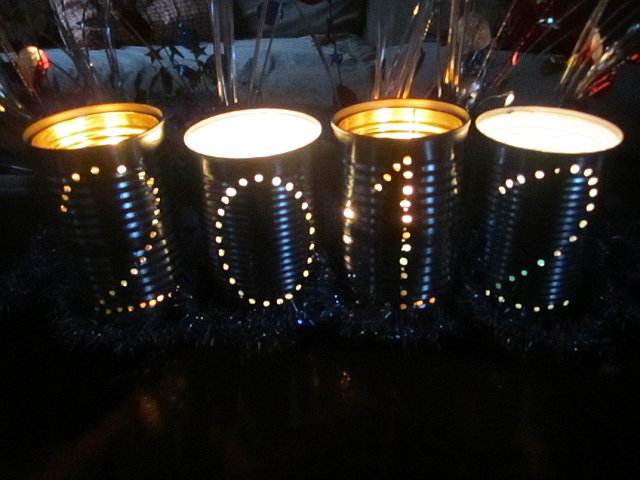
Happy New Year!

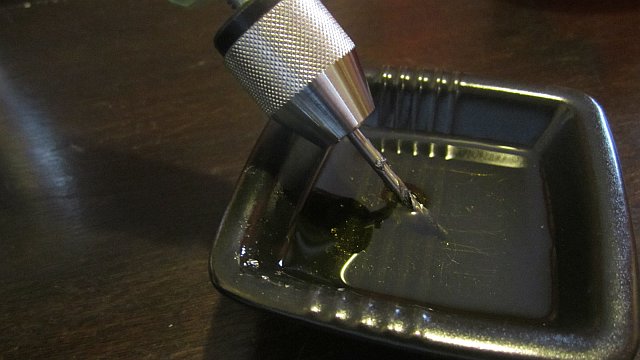
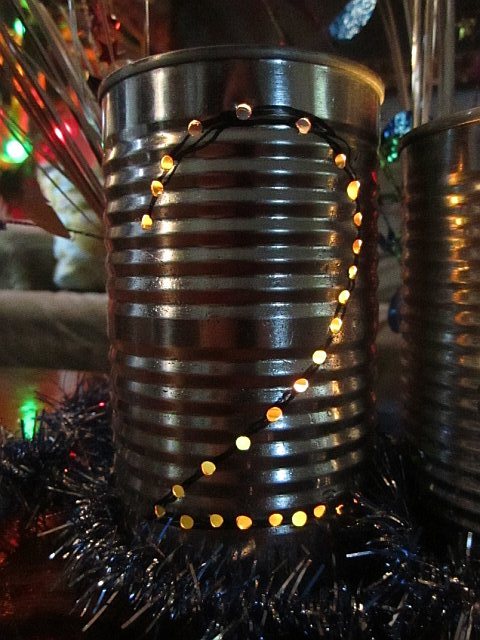
Make this quick tin can centerpiece by drilling holes in cans and dropping in a candle.  

1.  Draw number on can

2. Drill holes, make sure to lubricate drill bit with oil!!

3. Light it up!


0

Gold Leafing A Vintage Frame

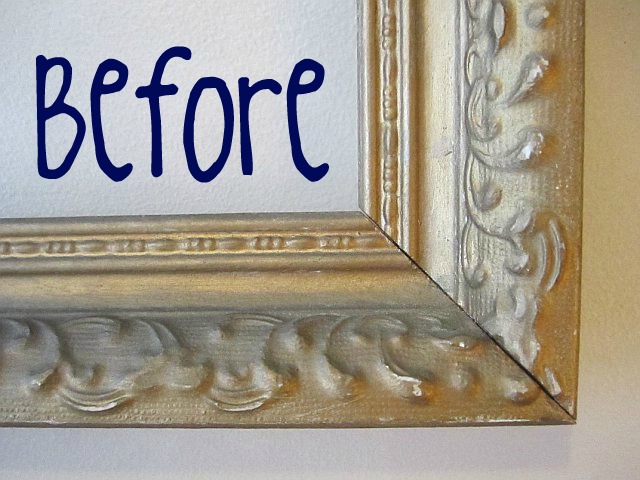
I tried my hand at gold leafing last night for the first time ever and I loved it.  It took this already beautiful- but dull- vintage ornate frame bought at Brimfield this past August and gave it a drag queen makeover. 

It’s so shiney!  And now so is my floor and my coffee table and my Mama Cat because she was “helping” me.  Seriously, this stuff gets EVERYWHERE.  It’s probably best to do it in a work room (don’t have one) or a garage (don’t have one of those either) or to go outside (brrrrrrr, no way!)  Livingroom it is!

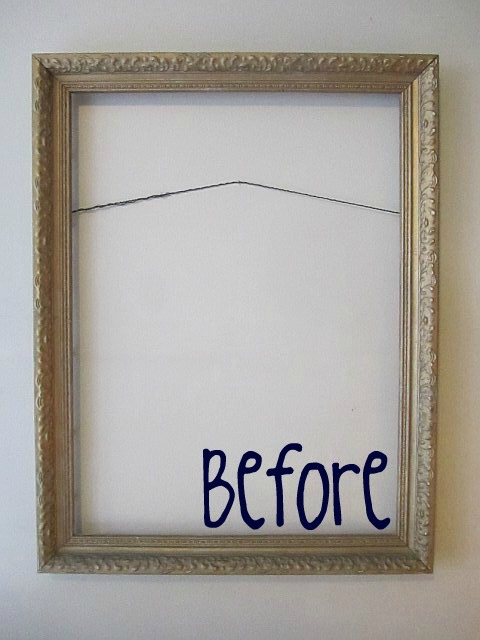
It’s worth it though ’cause look how pretty:

I gave the original mat that came with the frame a mini makeover too. 
It’s pretty simple:
  1. Cover entire surface of mat with gluestick
  2. Lay decorative paper face down on flat surface
  3. Lay mat, glue side down, on top of decorative paper
  4. Smooth out any ridges/bubbles
  5. Trim along edges with X-acto knife
  6. Bob’s your uncle.

 I can’t show you the finished product because it’s part of a birthday present.  Pictures to follow.
Have you ever gold leafed?  Got any tips for me?  I’d love to hear them!
0

Green Eyed Inspiration

Recently my friend Mike (who doesn’t get a last name because he’s internet shy) came over to my house (wearing his tinfoil hat) and was all drooly and “holy crap I want that!” over my awesome card catalog that I told you about earlier this year.  And I don’t blame him, the thing is radical.  
He later told me that he was “so inspired” (read: wicked jealous) that he when he got home he immediatly went on Ebay to find one for himself.  And then, when he couldn’t find one (in your face Mike!) he settled on this  beautiful set of vintage Post Office Boxes instead (oh wait, in my face!)  
(like this one is available here)
Then, because he doesn’t waste all of his freetime re-pinning and tweeting, he built a case and a stand for it making his officially better than mine.  (I hope you’re happy Mike.)
Now he just has to figure out what could possibly be worthy of being stored in these little boxes.  Mail is too obvious and besides, he would never have enough.  I guess he could put his weed in there but that would sure be a lot of reefer. 
Oh, I know!  He can use it to keep his anti-internet, conspiracy theory zines in order (first alphabetically and then numerically) and away from the prying eyes of the gum’ment.  Perfect!

(<3 you Mike!)

0

Fireplace From a Box: Instructables Box Challenge

My cardboard fireplace for the Weekly Make It Challenge on Instructables.com.  This week’s challenge was to make something from a leftover Christmas box. 
Here’s my entry and how I did it:
Step 1.
Get a box.


Step 2.
Draw an upside-down “U” on the front. 
Cut it out using an X-acto knife or scissors (careful dummy!)


Step 3.
Paint faux bricks on box using non-toxic acrylic craft paint. 
Fill in remainder with grey paint (optional).
Step 4.
Draw the outline of a flame on another piece of cardboard and cut it out. 
Step 5. 
Arrange fireplace and flames and decorate inside with red christmas lights for the fire.
Step 6. Enjoy!

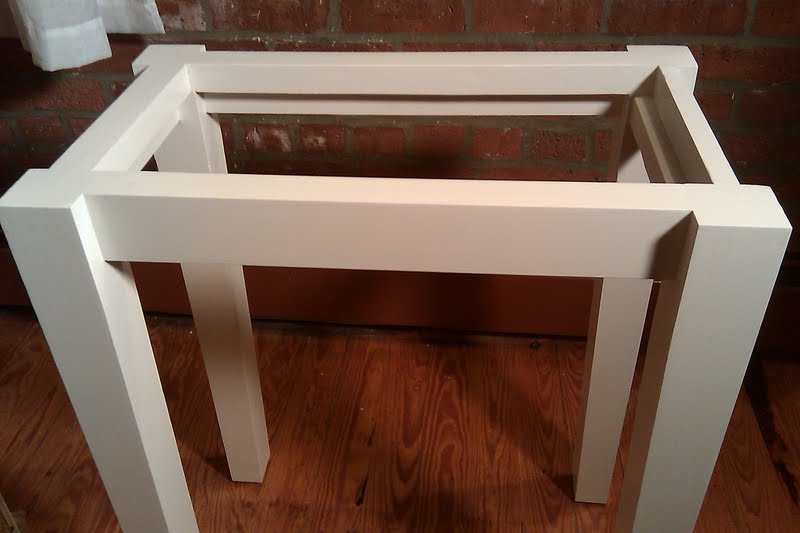
Someday I’ll have a real life fireplace until then it’s cardboard and christmas lights for me.

0

Microwave Toe Warmer Upper Tutorial

Here we are, a full week into Winter and not a single flake of snow has fallen in Boston.  So lame.  But, just because it is unseasonably warm, at least by New England standards, that doesn’t mean your sheets aren’t still freezing cold when you put your little footsies in them at night.  (Poor little footsies.)  Remedy that problem by making these quick rice filled, microwavable heat packs to slide under your covers while you brush your teeth to get your sheets all warm and snug-buggly (that’s what my Dad calls it) for your arrival. 
For this project you will need
  • 1/4 yard of muslin, canvas or flannel material
  • 1/4 yard of scrap fabric
  • 4C. white, long grain rice (NOT INSTANT)
  • sewing machine
  • thread
  • scissors
To begin cut 2 equal pieces of your canvas material into 10″x16″ rectangles.
Sew together on 3 sides and fill with 4 cups of uncooked rice.
Sew the 4th side together and you should have something that looks like this.
(No need to make the inside pillow look pretty, this is not a beauty contest.)
Now seperate 1/3 of the rice to one end of the bag and create a fold.
 Sew along this fold to seperate rice and add another seam (and another 1/3 of the rice) another 1/3 way down the bag.  These seams are to keep the rice evenly distributed through the bag.  (Omit if you’re not feelin’ it.)
**Tip: Sewing a bag full of rice is…interesting to say the least.  Elevating the surface next to the sewing machine for the remainder of the bag to rest on helps tremendously.  Also, sewing slooooowly helps too.**
Now trace around the bag onto some scrap material, with about an inch seam allowance, to create the pieces for your removable/washable case.  With the pieces right-side-in, hem the edges that will be your opening and sew the remaining 3 sides together.  Turn right-side-out. 
Microwave bag- with some water to prevent forest fires- for about a minute and a half and slip into case.
Flop onto sleeping husband’s feet and watch the cuddles wash over his face. 
I made a seperate one for sweet little outdoor kitty toes too.
Toasty warm toes on the day after Tuesday.  Terrific!
0

Why Don’t You Make Me?: Santa Hat Strawberry Brownie Bites

  
For Christmas I made these adorable santa hat brownie bites that I found over on Erica’s Sweet Tooth.  They’re pretty simple to make, here’s how:
Bake your brownies according to directions, let cool.
 Select a round biscuit cutter
  about the size of your strawberries.  
(Or use a mini-cupcake pan)
 Cut out your brownies.
 Rinse strawberries.
 Cut the tops and a teeny tiny bit of the 
bottom off for the chocolate to settle onto.
Melt your white chocolate and 
scoop into pastry bag with tip.
 FOLLOW THESE DIRECTIONS TO MELT YOUR WHITE CHOCOLATE.  

It’s not the same as melting milk chocolate, I found out the hard way.  Now, pipe some white chocolate on the tip of the waiting strawberry and onto the bottom between the brownie and the fruit and you’ll have little chocolate santa hats!

Hope you have a very Merry Christmas!!

0

Make Me: Holly Berry Gift Tag

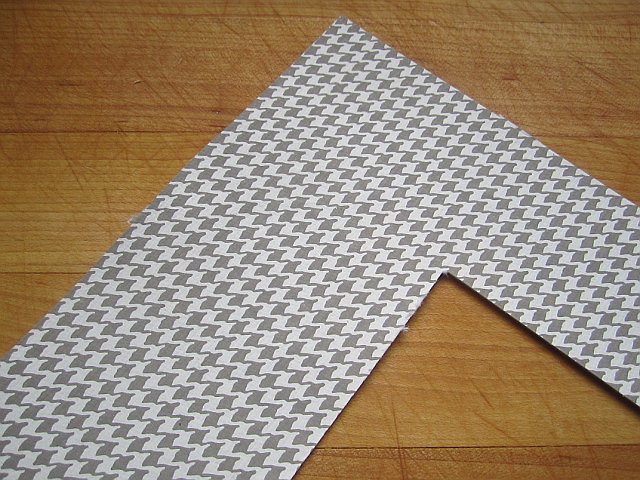
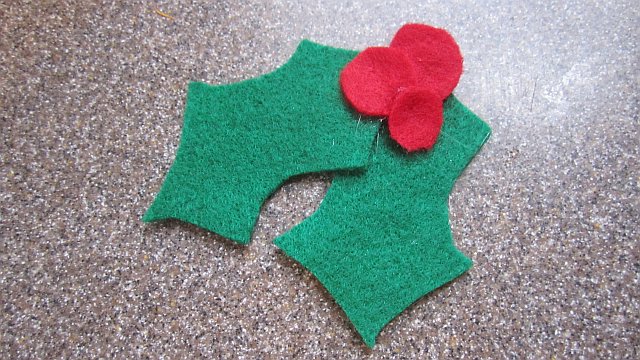
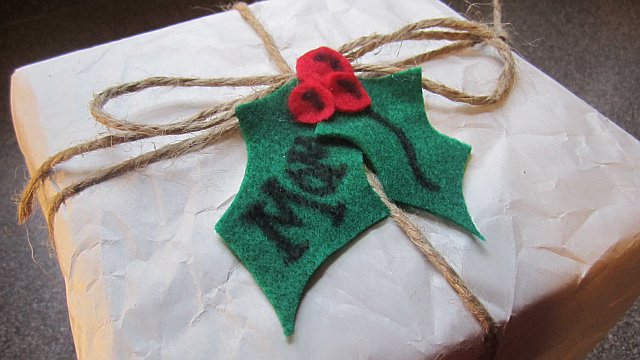
It’s Christmas Eve!!  The present-wrappin’-est day of the year!  Make this quick & easy gift tag to spruce up your presents.  Here’s how:

Supplies-

  • red & green felt
  • scissors
  • black sharpie
  • glue gun
Step 1: Cut leaves out of green felt.
 Step 2: Cut berries out of red felt.
 Step 3: Glue it all together.

Step 4: Hot glue directly on to present.
Step 5: “Awwwwwwwwww, I love it!”
2

The Name Frame Game

It’s not really a game, it just rhymed so I went with it.  Sorry I mislead you but as long as I have you here, look!

These frames- for cheerleading sisters Faith & Lylah- have been shipped off and by now should be wrapped and waiting patiently under the tree for Christmas morning. 
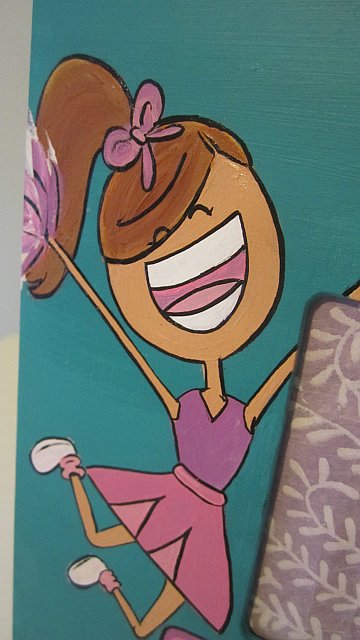
Which is more than I can say for myself because I can’t wait for the girls to see them.  Their Nonnie (aka Gramma) assured me that Faith & Layla are going to LOVE their frames and now, though I’ve never even met them, I am so excited for them to open their gifts!

It’s not weird if I invite myself over Christmas morning to watch them unwrap them, is it?  I’ll only stay for a little bit.  Just until my french toast is gone.  Maybe they’ll do a cheer with my name in it!!  Oh man, this is going to be the best Christmas EVER!!

1

Why Don’t You Make Me: Frosty the SHATTERPROOF Snowglobe

Last week I was home in ‘Rado for First Christmas (because you should always have at least 2 Christmases) and got to have a craft day with my 4-year-old niece, who by coincidence just happens to be the coolest 4-year-old ever, Tabitha.  One of the projects we made was this Frosty the Snowman snowglobe. 
Since this was going to be Tabitha’s very own special (“it’s just my perfect size!” in her words) snowglobe I thought it should be a little more kid friendly than the original snowglobes so instead of an old glass jar we used a plastic peanut butter jar.  (Sister didn’t have an empty peanut butter jar lying around so we emptied the peanut butter that was in this jar into a Rubbermaid container and now it looks like she makes her own peanut butter.  “Oh this?  Ya, I make my own, so much healthier.”  So, we both win!)

For this project you will need:

  • a pre-schooler
  • an empty peanut butter jar (plastic)
  • a non-metal character of your choosing (ours is glass)
  • Glitter
  • distilled water
  • glycerin
  • modeling clay
  • glue gun (do I really need to list that every time?)
Begin by adding a generous dollop of hot glue (about the size of a silver dollar) to the inside of your washed and dryed lid to adhere the modeling clay to. 
Then squish modeling clay into the entire surface of the inside of the lid.  Little fingers come in very handy for this.  The clay should be about 1/2″ thick.
Now, press your character into the modeling clay.  Make sure to secure it in there pretty good, cover the feet up with some extra clay and then pose for a picture with it.
Oh what the heck, pose for 2 pictures with it- it’s Christmas after all!
Now it’s time to prepare your globe.  Fill your jar almost to the top with distilled water (it has to be distilled or it’ll be cloudy) and 1tsp of Glycerin.  (More detailed instructions here.) 
Then put the jar in a big bowl and let your pre-schooler add enough Glitter to choke a reindeer. 
**The bowl is just to catch all of the extra Glitter that is sure to go everywhere if you hand a jar of Glitter to a 4-year-old.**  Case in point.

 
(For the record, this is how much Glitter it takes to choke a reindeer.)
Now, screw on your lid.  This should be a little tough because some of the modeling clay will get into the threads of the jar.  That is a good thing because it helps to seal the lid onto the jar.  That is a bad thing because I have weak little noodle arms and almost had to ask for help to get my lid on.
**TIP: if you’re using an ornament like we did, be sure to remove the metal top because it will rust.  We also filled Frosty with water before submerging him so that there wouldn’t be extra air bubbles in our snowglobe.**
Next add a line of hot glue around the base of the lid and stick some garland to it. 

And you’re done! 
Now run up to your room and find the perfect place for it.  Tabitha did.  Then she immediately took it down, shook it up and Tim Tebow’d it across her room somehow.  I’m happy to report that Frosty passed this little quality control test with flying colors.  Toddler proof and proud!!

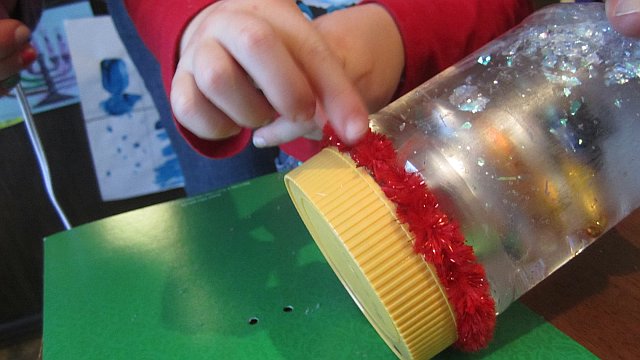
These snowglobes make wonderful last-minute gifts.  They’re super quick, inexpensive and made by hand so they’re extra special too.  Merry Christmas and happy crafting!

~mandee rae
0

My Outdoor Cat: the Heating Pad

I just got this small animal heating pad for my adopted outside cat Gritsy’s outdoor kitty house.  Grits won’t sit still for a picture so here’s a picture of a bunny from the Cozy Winters website instead.

The heating pad is made specifically for small animals and never gets over 102 degrees.  It has a chew resistant cord and is actually activated by the weight of your pet.  So, when Grits is running around chasing squirrels and getting pet by neighbors, the heating pad remains just a couple of degrees hotter than the air outside.

And it says right on the box that it’s ‘Great for cat houses’.  Grits spent her first night with it last night and she seemed very happy this morning.  Hope this helps you with your own outside cat.