0

QUICK & EASY St. Patrick’s Day Centerpiece

Here’s a quick & easy idea for a festive St. Patrick’s Day or Spring Centerpiece that you can make for under $10!


To make this you’ll need:

  • 3- 1/2 pint mason jars (lids not necessary)
  • a small tray (optional)
  • matte white spray paint or white primer
  • a handful of 1″ rocks
  • 1 clover plant
  • potting soil
Remove lids from mason jars and put on a paintable surface, mouth-side down. 

 Spray entire outside of jar with paint, it will probably need between 2-3 coats.

 Do the same to the tray, my tray needed 2 coats of paint, it has 1 coat in the picture.  (Tray was $3.99 at craft store)

Add 6-9 rocks per jar, enough to fill about 1/4 of the jar.  This is to create a place for the water to drain from the soil.  Add 2″ of potting soil.
Separate clover into 3 sections and add 1 section to each jar, press firmly around base to secure plant into the jar.  Arrange the jars on the tray and you’ve now made a beautiful, fast & easy St. Patrick’s Day centerpiece!  This would also look adorable with herbs, small flowers or succulents.  

 May the road rise to meet you, may you never be burned by your glue gun and until we meet again, may all your crafts be prosperous!

0

Make Me: Upcycled Wrapping Paper Covered Light Switch

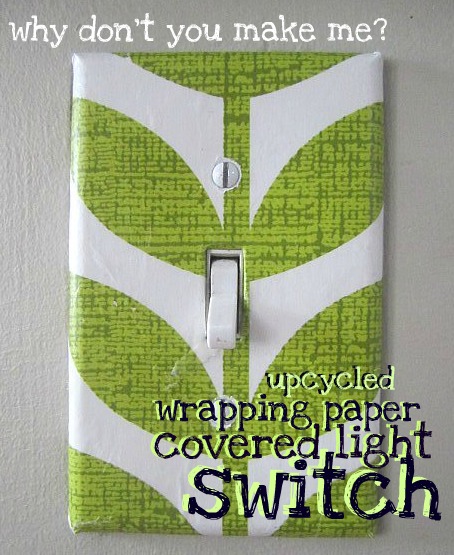
Due to a lackluster showing this winter from the Snow Gods my Spring Fever has kicked in earlier than normal this year.  The fact that the sun is shining and there is no snow on the ground makes me want to sweep the porch, get out the plastic flamingos and fill every pot I own with flowers.  Problem is, even though the sun is technically shining, it’s still only about 40 degrees outside.  Brrr.  That’s a little cold for flowers.  So, while I wait for the weather to warm up outside, I decided to bring my Spring Fever inside this weekend and make this green leaf  upcycled wrapping paper covered light switch.

For this project you will need:
  • a light switch cover
  • matte mod podge
  • a paintbrush
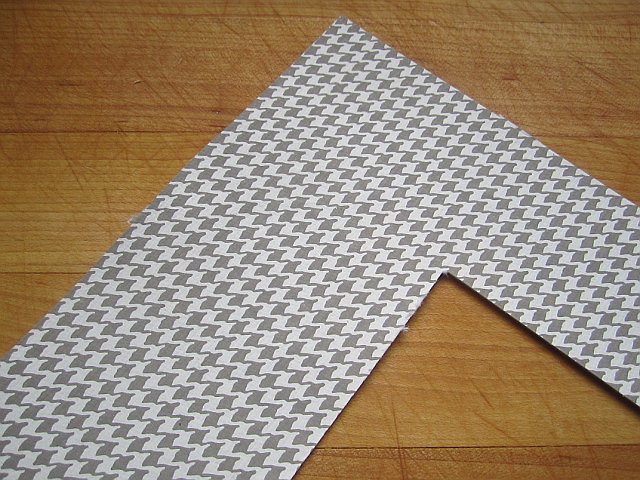
  • some leftover wrapping paper and/or tissue paper
  • the cutest miniature screwdriver I ever saw
To start, pick a light switch cover that needs a pick-me-up.  
Look at this guy, he’s completely let himself go.  

Remove it from the wall with a tiny little screwdriver that is so cute!   

A-hem, or just use a regular screwdriver.  Wash the cover to get rid of oily fingerprints and dust.


Lay your cover on top of your chosen paper- I chose this wrapping paper that I’ve been hoarding saving for the perfect project since rescuing it from a present I received a couple years ago.  

Cut around the cover leaving about 1/4″extra on all sides. 

Wrapping paper works very well for this project because it is soft and bendable but remains sturdy even when wet with glue.  Card stock is too stiff for this project and tissue paper can be difficult as it tears easily.

Cover the entire surface of the light plate with Mod Podge and lay the paper over the top, paint a layer of Mod Podge on the surface of the paper as well, smoothing out any air bubbles as you go.  

Once dry, about 20 minutes, flip the cover face down on your surface, cut the corners with an X-acto knife and glue the paper around the corners like you’re wrapping a present.  

Add Mod Podge to both sides of the paper to make it pliable and secure the paper to the light plate.  


Cut an ‘X’ into the backside of the paper where the light switch goes (this is much easier if the paper is completely dry if it is still wet, wait for it to dry or you may rip the paper), add Mod Podge to both sides of the ‘X’d paper and glue down. 

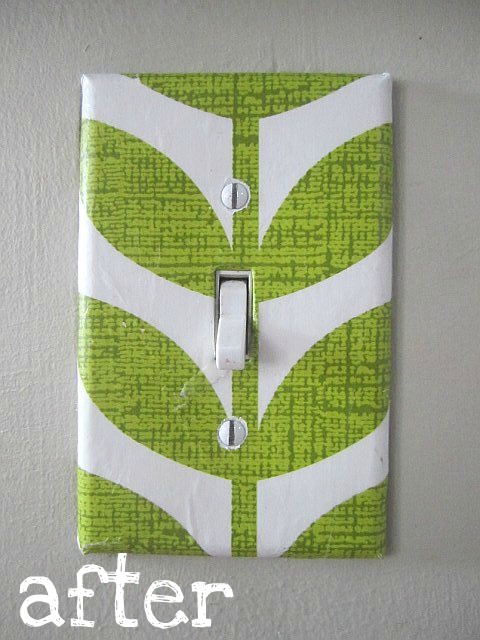
Allow to dry, about 15-20 minutes, if desired add another coat of Mod Podge to the entire front of the light switch to ensure it’s fully sealed and you’re done.  


Grab your adorable little screw driver and put him back on the wall.  

                                                       
Muuuuch better.


Now there’s nothing left to do but sit back and wait for Spring.  Only four days until Daylight Savings-  We’re almost there!!

0

Before & After: the Painting Process

Makeover shows, be them human or residential, are a major weakness of mine.  Mostly because I love a good before-and-after picture.  I love seeing a neglected little kitchen in Iowa that hasn’t been updated since Reagan was in office be turned into a gormet cookery fit for the White House.  It’s so satisfying to see the design come to life and the before-and-after shot at the end is what makes it all come together.

The same is true for paintings.  Whenever I’m asked to do a custom painting I always start with a sketch to make sure the customer and I are on the same page.  Once the drawing is approved, I get ‘er painted up and no many how many times I go through the process I still love seeing the before and after shot at the end.    

For instance, you can go from hand-colored sketch to nice looking piece of art (if I do say so myself):

From an idea in a notebook to a wall-sized triptych that is now the highlight of Lil’ Dillon’s room.  

From a basic scribble to a full-blown stadium.

From outline to outstanding….ya, I just said that.  
Click HERE to see more before-and-afters.  

And feel free to email me if you have an idea for a painting…or if you just want to talk about muffins. 

0

Easy Stool Makeover: Before and After

Stool: $4 at a garage sale
Can of spray paint: $3.95
Time: 10 minutes to sand/spray, 1 hour to dry
Result: adorable new red plant stand

To keep the natural character of this stool I chose to only lightly sand the varnish off before painting it.  This way, all of the wear-and-tear and naturally acquired flaws still show through after painting and you’re left with an adorable stool that looks like it’s  always been red.    
Total cost: under $8.  Not bad.  

**TIP** If you want to make this project extra easy, set the stool and the spray paint outside and tell Liz you’ll do it in a minute.  She can’t resist!

0

Gold Leafing A Vintage Frame

I tried my hand at gold leafing last night for the first time ever and I loved it.  It took this already beautiful- but dull- vintage ornate frame bought at Brimfield this past August and gave it a drag queen makeover. 

It’s so shiney!  And now so is my floor and my coffee table and my Mama Cat because she was “helping” me.  Seriously, this stuff gets EVERYWHERE.  It’s probably best to do it in a work room (don’t have one) or a garage (don’t have one of those either) or to go outside (brrrrrrr, no way!)  Livingroom it is!

It’s worth it though ’cause look how pretty:

I gave the original mat that came with the frame a mini makeover too. 
It’s pretty simple:
  1. Cover entire surface of mat with gluestick
  2. Lay decorative paper face down on flat surface
  3. Lay mat, glue side down, on top of decorative paper
  4. Smooth out any ridges/bubbles
  5. Trim along edges with X-acto knife
  6. Bob’s your uncle.

 I can’t show you the finished product because it’s part of a birthday present.  Pictures to follow.
Have you ever gold leafed?  Got any tips for me?  I’d love to hear them!