


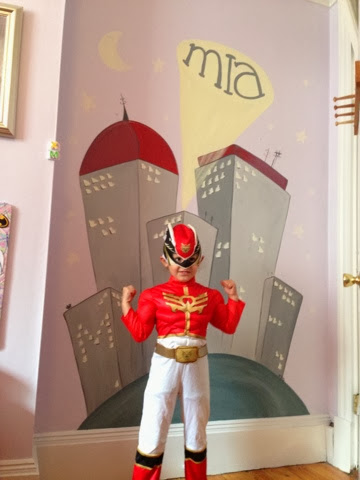
A couple of weekends ago I did this super hero city on the wall of one of Cambridge’s Finest SuperHero-esses: Miss Mia the Magnificent! Little Miss Mia is quite the superhero aficionado and loves playing dress up in her many costumes BUT until now she had no where to showcase her beautiful outfits. That has all changed now thanks to this wonderful idea from her awesome Mom. (Good job Mom!)
Now Mia has her very own city to save from peril including her own spotlight with her name in it and in the lower left building a capital “M” in lights to make it just a little more special.
Thanks for keeping our city safe from bad guys Mia. The world is a better place with your cute little face in it.
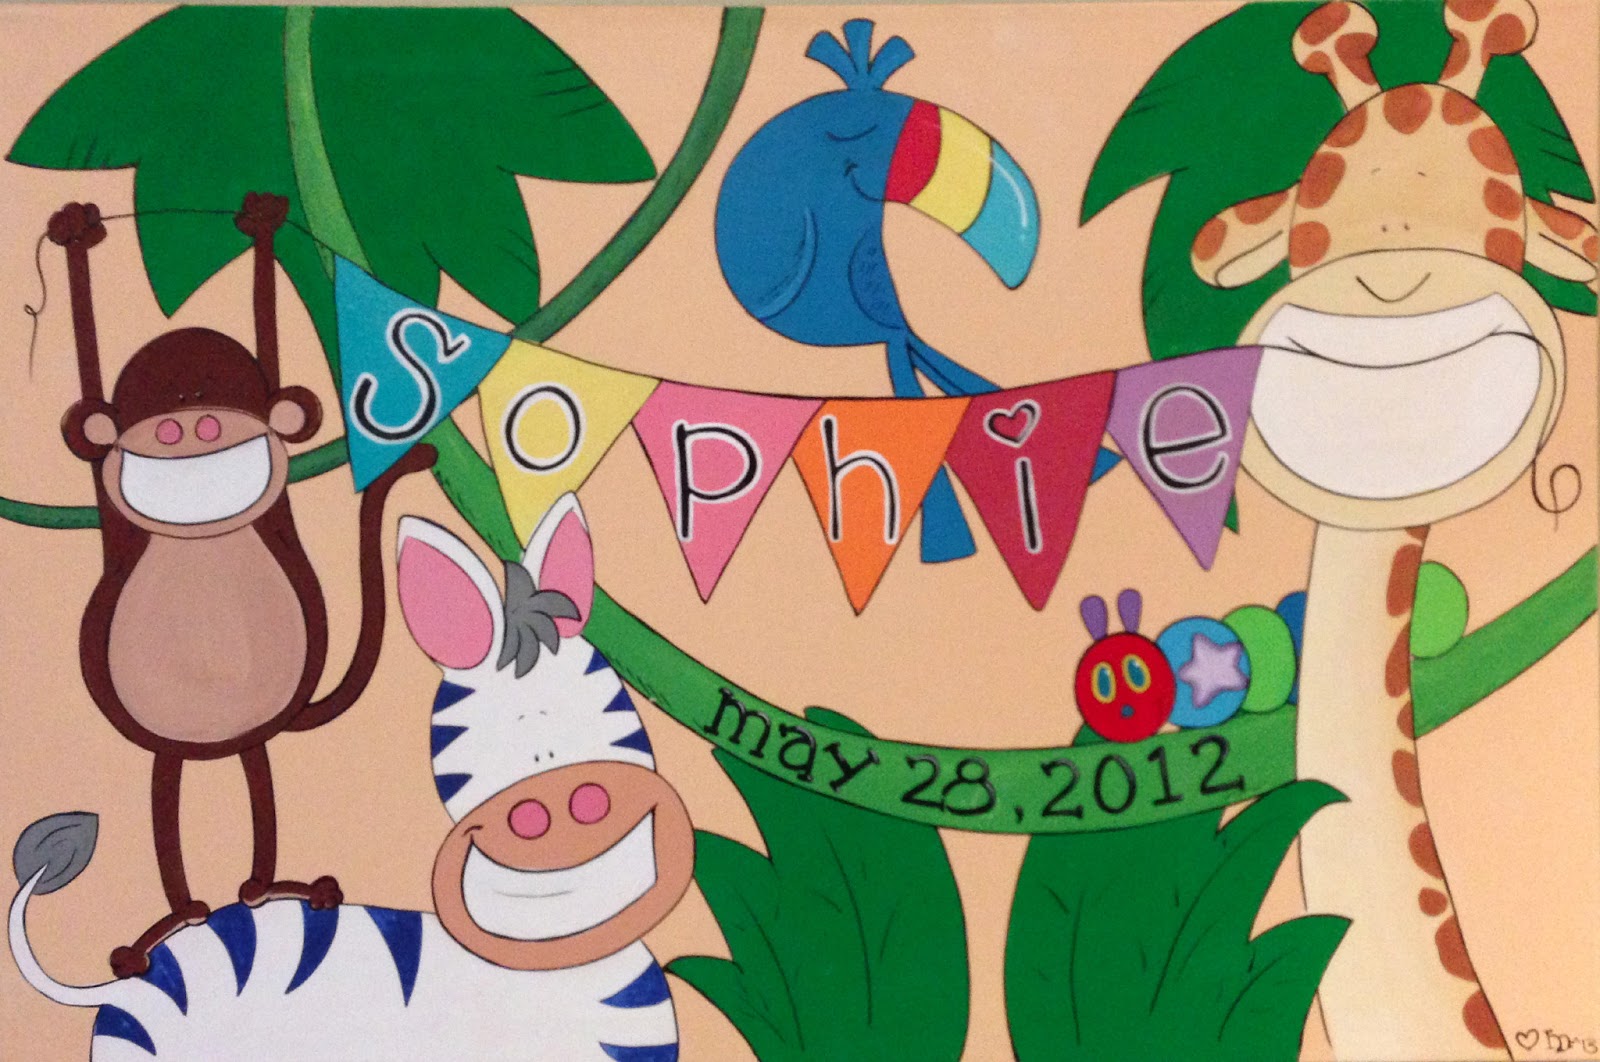
I just painted these guys for some sweet little girls.
Maeve’s favorite colors are green & pink. Mina’s are grey and hot pink. And you’ll never guess their favorite animals!…


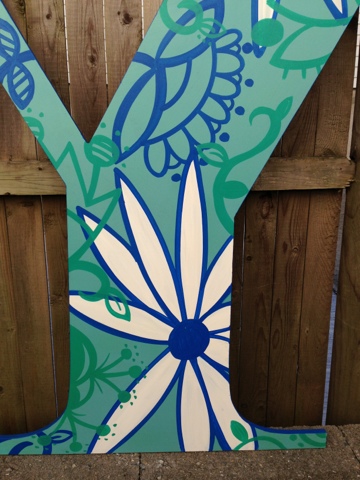
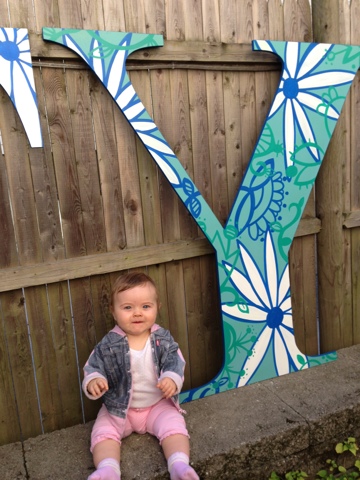
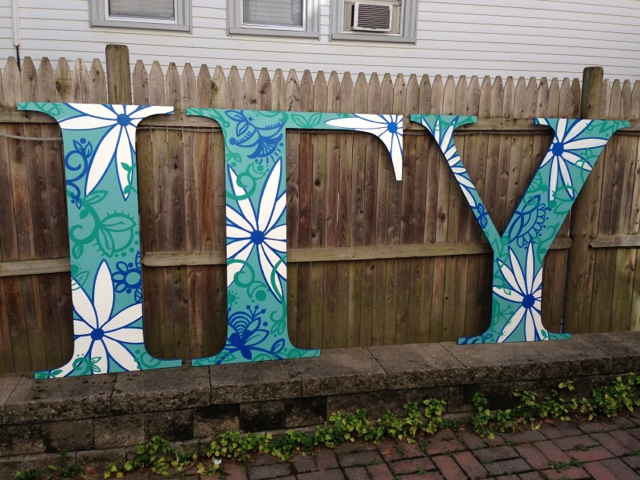
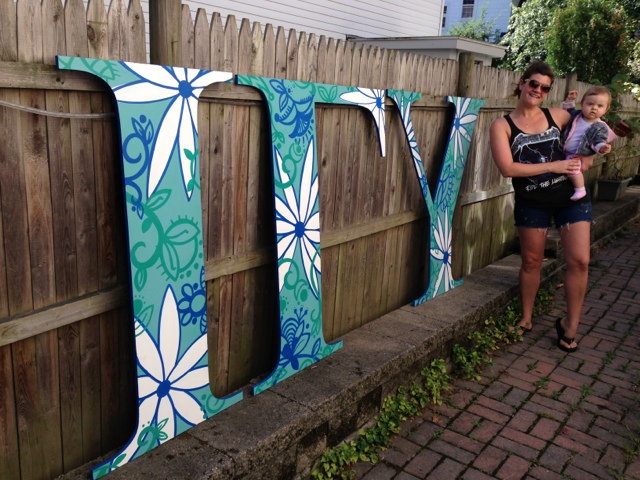
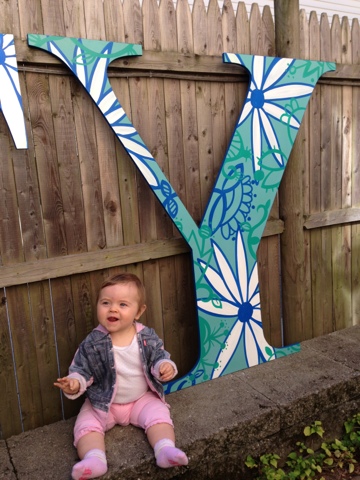
 Ok, maybe I didn’t actually join a sorority BUT I did paint some FOUR FOOT TALL lawn letters for one! The super nice ladies of Ioma Gamma Upsilon at U-Mass Amherst contacted me to customize their new letters and I couldn’t wait. It’s probably the most unique (read: weirdest) request I’ve had to date so I was obviously all about it.


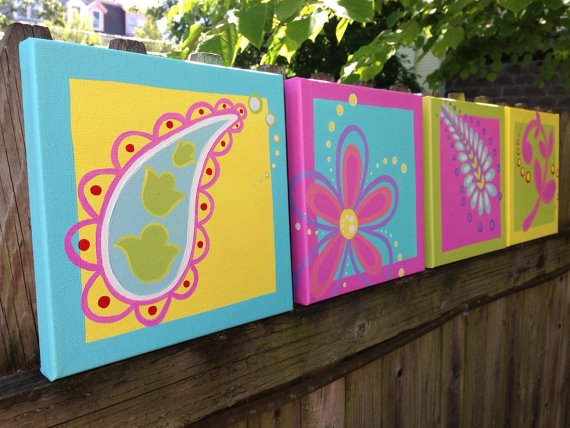
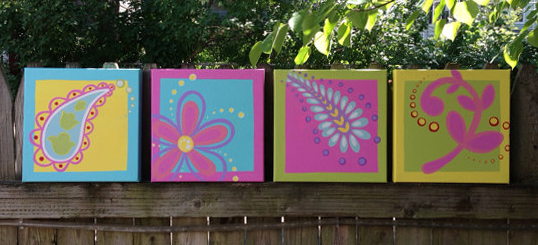
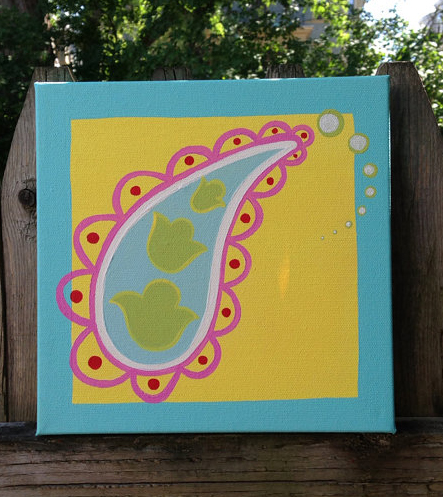
These paisley paintings were done for a little lady’s room inspired by the lampshade her Mom bought at PBK from the Tera Paisley Collection.

All of the designs mimic the style of the fabric but are completely original to match the overall color-scheme of bright pinks, purples, greens and blues in her room.


 Part of it feeling more real is that my Mom completed the crib set that she made for us for the baby shower and it came out cuter than I could have ever imagined! We got the fabric from my friend Aurora’s store, Fabric Bliss, which is located in Denver but they have a very easy-to-navigate online shopping feature. I emailed Aurora and told her that I was looking for something “dainty but not girly, that coordinates but doesn’t match, has a vintage feel and it can’t be pink!” Immediately she wrote back and suggested the Seaside collection from October Afternoon.
 And it’s beyond perfect!!

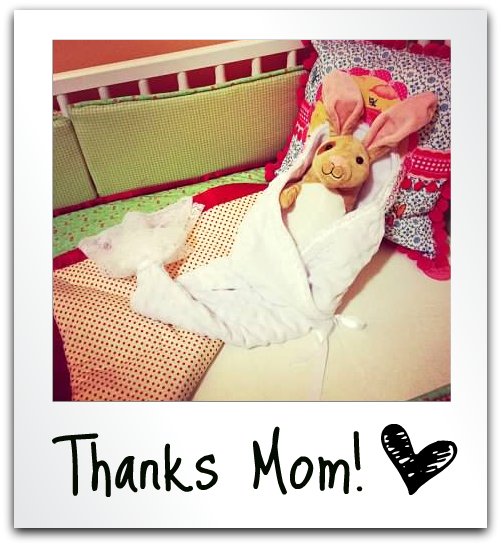
My Mom also made this precious mermaid-tailed receiving blanket (her own design) and I can’t get enough of it! Thanks Mom!! You’re the greatest!

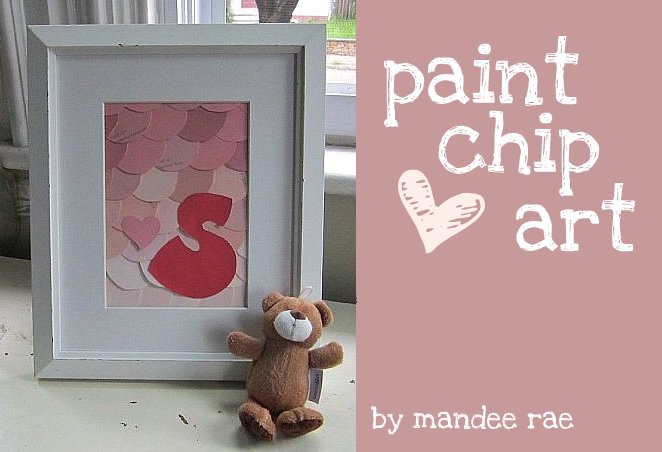
New picture frame for Sofia. Contact me for one of your own. Makes a great Christmas present.

Included in the painting are Vivan’s favorite stuffed animals, herself and of course, a girl’s best friend, her dog, Milo.
Vivan wasn’t home to see the painting in person when I dropped it off but luckily her Mom shot me this adorable play-by-play of when she first saw it:

“I wanted to let you know about Vivian’s reaction when she first saw your painting. She saw it as soon as she walked into her room yesterday afternoon, and did a total double-take. Then she pointed at Dolly in the picture and said her name, and went to grab the actual Dolly from her toy bin so she could hold her just like she is in the picture. Then she pointed at each of her “friends” in the picture and named them, and also pointed out Milo. I asked her if she liked the picture, and she said, “Yesssss!””
Reactions like that make this job even sweeter, if that’s possible.
And, as if that weren’t enough, piggy-backed on top of all that sweetness was this painting also done for Vivian commissioned by the original word-of-mouth advertiser, the customer I painted Ryan’s Safari for.  Little V is a second generation Chinese-American, this is her birth animal, the tiger and her name written in Chinese characters. It was painted to coordinate-with but not necessarily match the playground painting in order to keep the room from looking too “theme-y” (which is definitely a word) and topped off with a distressed white frame.

Thanks for stopping by and please don’t hesitate to contact me with questions if you’d like your own custom nursery artwork!
…don’t be a stranger, ya’hear?
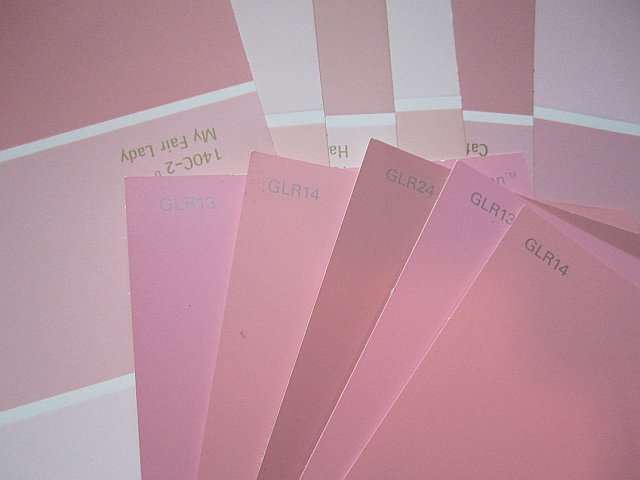
Next, find a small circular object to outline onto the paint chips to utilize as much of the colored area as possible- I used a small roll of tape- and cut out your circles.

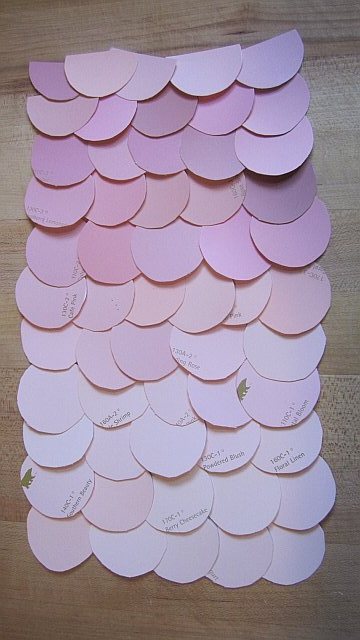
Experiment with the layout of your circles until you have ’em just how you want ’em.
Prepare your frame– I got this white matted frame for $5.99 at the Christmas Tree Shop by my house- the frame has some dings in it but I’m writing them off as “shabby chic.”

Remove the mat and backing from the frame and outline the opening of the mat directly onto the cardboard backing.

Now, starting and the bottom and beginning with the lightest layer, glue the circles to the cardboard using a glue stick. The second layer should overlap the first slightly and the circles should become progressively darker towards the top of the cardboard.

Cut out the letter, glue it into place wherever your little heart desires and presto- you’re an artist.


