0

The Snowman Family window painting

Winter window in the EU at Beth Israel:
a snowman family celebrating the upcoming Winter Solstice!


We’re celebrating the winter solstice in our house too 
because it’s our baby snowgirl’s first birthday on the 21st.

I can’t believe it’s already been a year and at the same time that it’s ONLY been a year.  What a whirlwind!  

Happy Birthday little snowgirl!  Mama loves you!!
0

Sadie the Incredible Mermaid Girl: D.I.Y. Traveling Side Show Mermaid Baby Costume

This year was my baby girl’s first halloween as a dress-up-able-human and it was imperative that she have the perfect first Halloween costume.  I had originally had my heart set on her being the bearded lady in a side show but when she wouldn’t leave the beard on I decided to take advantage of the fact that she’s not walking yet and put her in some sort of a sack costume which also meant that I would need to decorate her stroller…which naturally led me to make her the Incredible Mermaid Girl in a traveling side show!

I created her stroller cover using foam core as the fish tank frame; blue fabric, glitter tulle & clear plastic Christmas ornaments for the water; and foam core for the signage & held it all together using a glue gun.  I attached the whole contraption to the stroller (a Britax B-agile) using Velcro Garland Tie and all that was missing was a fat little mermaid to go inside.

Enter one fat little mermaid.  

I have a tutorial on how to make the shell top for the costume here 
& the mermaid tail tutorial is in the works!  
I’d love to see pictures of your home-made Halloween costumes.  Happy Be-lated Halloween!!
Christmas here we come!!!!!!!!!!!!!!!!!!
0

Parenting Project #1: Homemade Baby Wipes

In honor of today being the first day of Spring, I thought we could start our Spring Cleaning by focusing the most important object in the house: the baby.
And more specifically- her bottom. 
When my little Sadie Jean was a mere 1 week old she got the most hellacious diaper rash I’ve ever seen.  (**it should be noted here that I’ve probably only seen 3-4 diaper rashes in real life but still, it was BAD!)  So- I started asking around to my circle-of-Moms to find out what they use to cure them and more importantly- to prevent them and was handed down this awesome Do-It-Yourself Butt Wipe recipe from my friend Katherine, who’s the mother of twin boys, and I’m happy to report that Sadie is now 12 weeks old and has remained diaper rash free!  This is a big deal in my life.  (Thank you Katherine!!)
So, without further ado, I give you the…

KATHERINE’S RECIPE FOR A HAPPY BABY BUTT
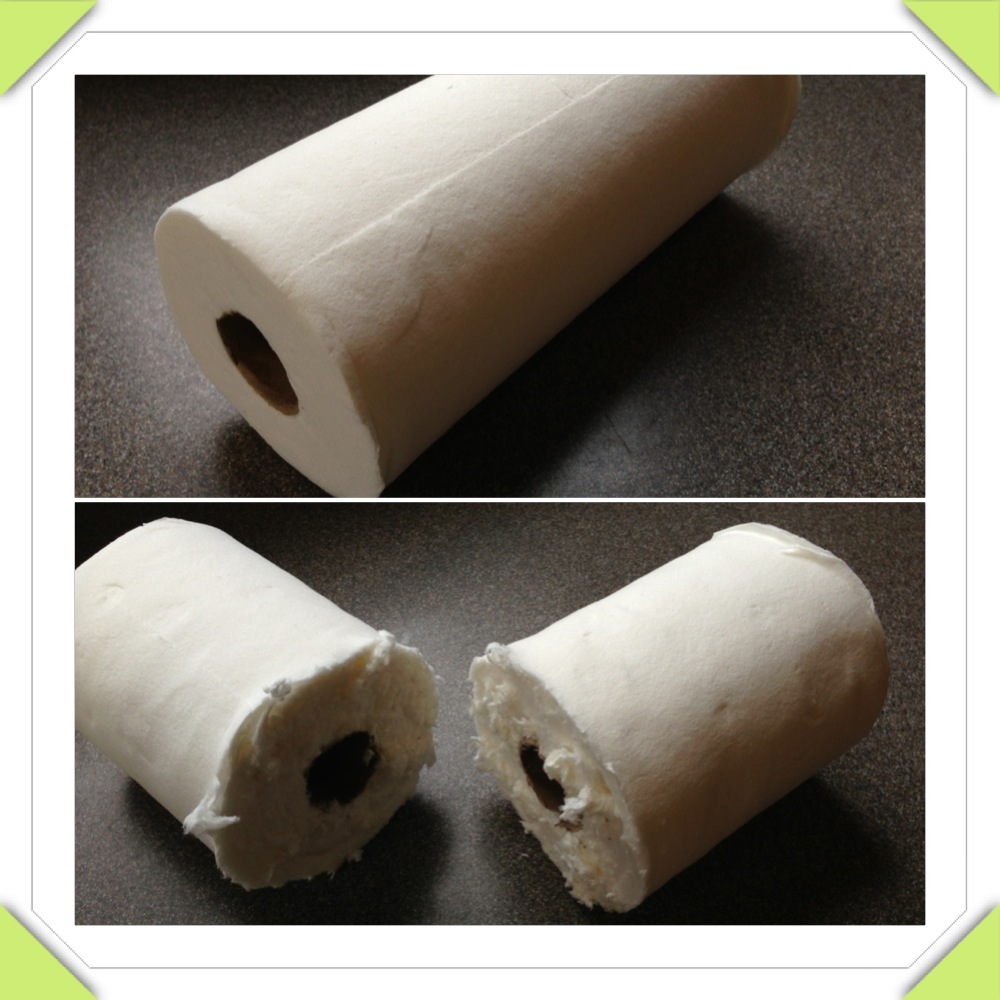
  • 1 roll paper towel, cut in half
  • 2C water
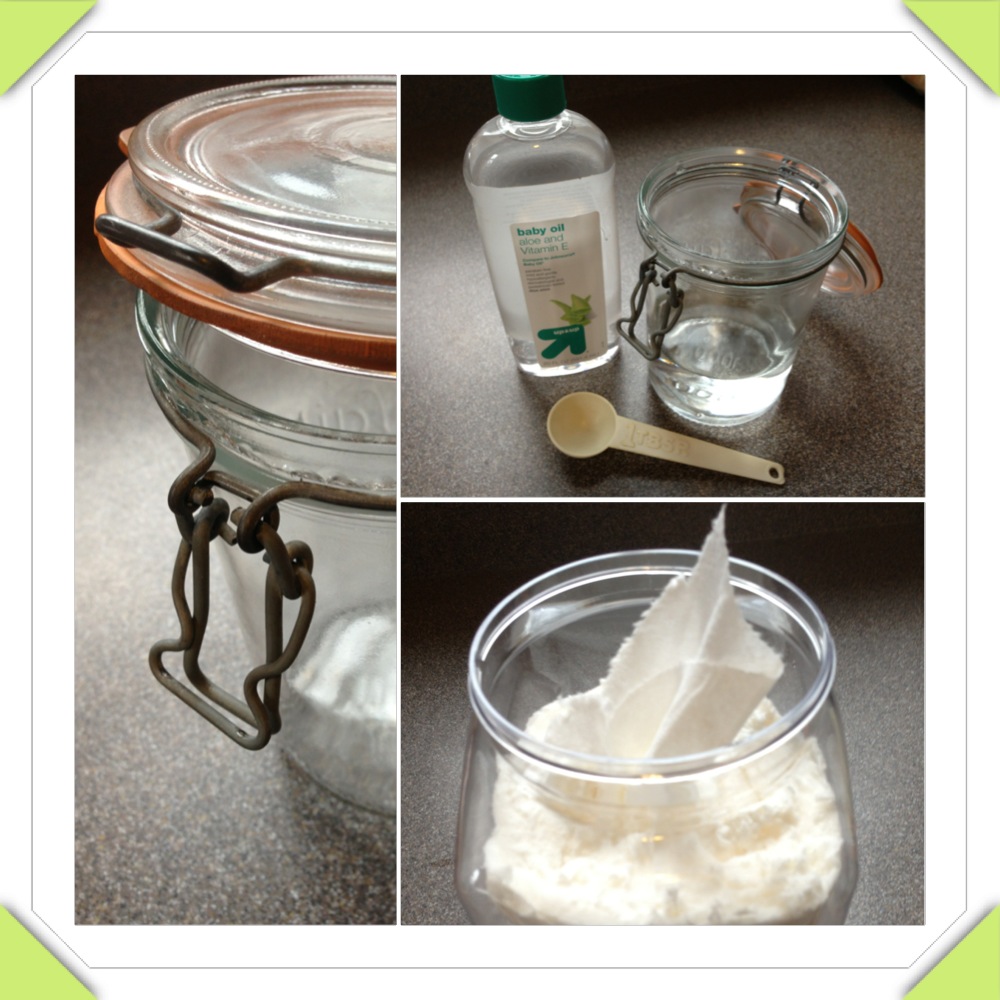
  • 1/8C baby oil (that’s 2 Tbls)
  • a squirt of baby wash (just a dab’ll do ya)
  • 5 drops tea tree oil (a natural antibacterial)
  • a rubbermaid container with a lid
To make these wipes, first cut a roll of papertowels in half.   
(I use Viva because they feel the most like cloth)
Remove the inner cardboard tube and pull out the first square of papertowel.
Now mix your ingredients.  I put mine in a seperate jar and then dump them over the papertowels while already in the Rubbermaid but you can do whatever you want.  It’s your party. 

Swirl the ingredients gently to mix but don’t shake them up or it will get all foamy and not soak into the papertowels right. 


Put the half roll of papertowels into the Rubbermaid, pour the mixture of the entire roll and let sit for at least 15 minutes to get them completely wet and you’re done!  You’ve made your first batch of butt wipes.  These are not only a nice way to cut down on the amount of chemicals being used to clean little Juniors rear end but they’re also economical.  For this roll of 88 wipes the total price was $.98!!  You just can’t beat that!!

Hopefully these work for you as well as they’ve worked for us! 
Diaper rash free in one-three!!
0

Winter Fireplace Window Painting


This month’s window painting is special not only because it’s some magical fireplace burning out in the middle of a snow storm but also because it’s going to have to stay up for 3 months- a.k.a. the length of my maternity leave.  
My last day of work is on Wednesday and Baby Sadie is expected to come by January 1st!  Which should be plenty of time to disinfect my entire house top-to-bottom about 3 times before she gets here…this nesting thing is no joke.  

Let it snow!  Let it snow!  Let it snow!
1

Getting Ready for Sadie: the Bedding

Getting the nursery ready for our upcoming bundle of squish has been really fun.  It’s still weird to think that I’m going to be the Mom and that this is all for my own daughter but as our due date approaches (Jan. 1st!) it’s becoming more and more real. 
Part of it feeling more real is that my Mom completed the crib set that she made for us for the baby shower and it came out cuter than I could have ever imagined!  We got the fabric from my friend Aurora’s store, Fabric Bliss, which is located in Denver but they have a very easy-to-navigate online shopping feature.  I emailed Aurora and told her that I was looking for something “dainty but not girly, that coordinates but doesn’t match, has a vintage feel and it can’t be pink!”  Immediately she wrote back and suggested the Seaside collection from October Afternoon.  

And it’s beyond perfect!!

All of the fabrics coordinate with each other but don’t necessarily “match”, the prints are dainty enough for a baby girl but not drowned in pink-on-pink and they have an adorably vintage feel that goes perfectly with the vintage feel we are going for in the nursery.  

My Mom also made this precious mermaid-tailed receiving blanket (her own design) and I can’t get enough of it!  Thanks Mom!!  You’re the greatest!