
the best thing about parenthood? PHOTOSHOOTS!!!
because every infant needs a feather fascinator.
happy valentine’s day!!!


 My beeeeautiful friend, and bride-to-be, Stephanie requested that I make her a piece-of-cake fascinator for her upcoming birthday/bachelorette party.

I started with a cardboard form, iced it with white paint, threw on some pearls and then basically submerged the whole thing in glitter.
The only thing more fabulous than this fascinator is the little lady it was made for- Stephanie I’m so incredibly happy for you and I can’t wait to see you in your weddin’ dress!! Tim is a lucky man…but I bet you tell him that all the time. **MUAH!!**


Oh no! You waited until the last possible second to figure out what you’re going to wear for St. Patrick’s Day?!? ME TOO!! Here are 2 quick options that you can throw together in either 20 minutes or in under 10 minutes.
**NOTE: These projects will probably require a quick trip to a craft store after work but never fear, Michael’s is open until 9:00pm tonight so you should be all set.**
20 MINUTE OPTION: Light-up Shamrock Shirt

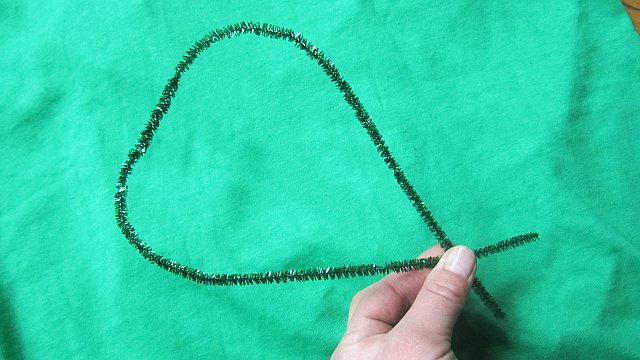
Begin forming a shamrock by bending 2 pipe cleaners together for the outside of the shamrock and secure with hot glue to t-shirt.

(a piece of cardboard inside of the shirt creates a stiff work surface (that’s what she said) and keeps the glue from going through to the back.)
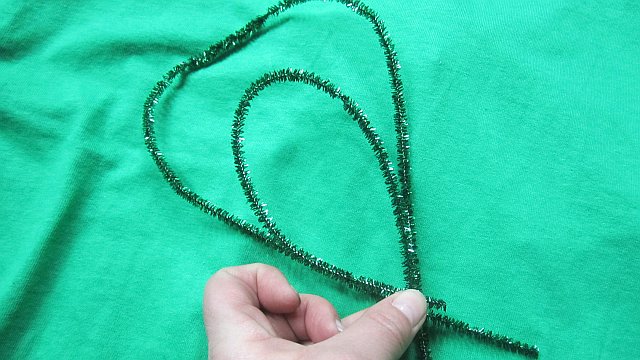
Add a second and a third loop inside of the outer outline to fill it in a little and make it fancy.

Glue both of those loops to t-shirt with hot glue. Repeat 3 more times to create a 4-Leaf Clover.

Next, cut a series of small holes (as many holes as lights) along the inner rim of the outside of the shamrock’s border. These holes are for the lights to poke through so they don’t need to be very big. Just a tiny slit.

Poke the lights through the holes and secure with hot glue. Hold for about 10 seconds to let it set.
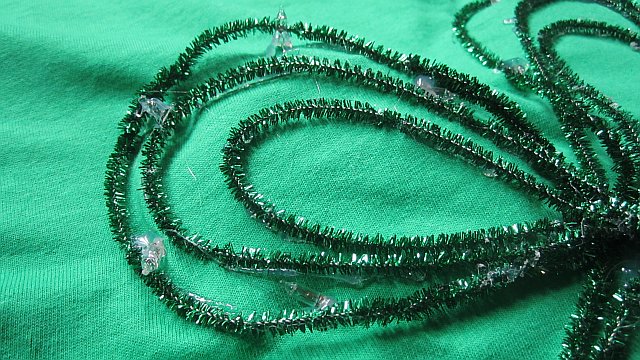
I only had enough lights to put 4 lights on each leaf.


And you did it all in under 20 minutes!
Next…
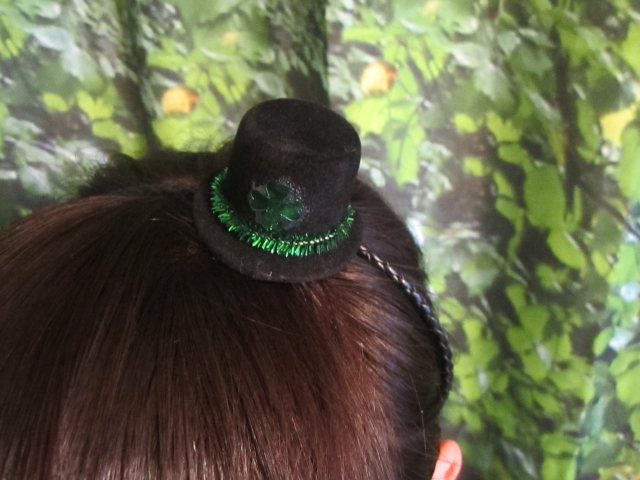
UNDER 10 MINUTES: Mini Top Hat Headband
For this project you’ll need:
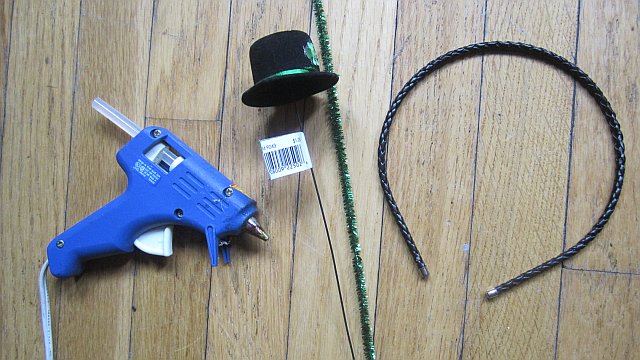
I found this ridiculously miniature (and equally adorable) top hat at A.C.Moore yesterday on sale for $.50! If you can’t find a mini top hat just look around for something else green and if you can’t find anything, cut a clover out of cardboard and color it green with a marker and go to step 2.)
Step 2. Remove wire.

Step 3: This step is optional- I didn’t like the green ribbon my hat had so I replaced it with a sparkly green pipe cleaner.


Step 4: Now, flip the hat over, add 2 dollops of hot glue to the brim and place your headband onto the hot glue wherever you want the hat positioned.

Step 5: Flip the head band back over and you have a brand new mini top hat headband.

Well aren’t you adorable. Now go out and show off how crafty you are.
Here’s to a long life and a merry one.
A quick death and an easy one.
A pretty girl and an honest one.
A cold pint– and another one!
‘Beannachtam na Feile Padraig!’
Happy St. Patrick’s Day!


1. Go to your local frozen yogurt and/or ice-cream store and embarrassingly ask them for 5 empty containers and one mini container.

2. Hastily cover each ice-cream dish in the fabric of your choosing.
I glued mine on using a hot glue gun as I do with almost everything in my life. It’s not completely necessary to make this beautiful, obviously, just get the fabric on there.

3. Here’s where the “very dumbed-down” portion of this tutorial really shines through:
Hot glue some feathers on the top and add some googly eyes. (See what I mean?)
It’s also a good idea to glue a string to either side of the hat (on the inside) to serve as a method to tie the hat to your head.
Which brings us to Step 4!….
4. Tie the hat to your head and you’re done!
Now go to the party and wow your friends with your craftiness!


