

My friend Danielle can’t draw. I tell you this because, while she can’t physically draw anything herself, it doesn’t stop her from needing things drawn constantly. Get Well signs, Birthday cards, kitchen placards…you name it. And most of the time, when she needs one of these graduation/bar mitzvah/baby shower signs made she comes to me and says, “hey Mandee, do me a favor?” and after hearing that phrase over and over ad naseaum, she earned herself the nickname “Toomey a favor”. (Her last name being, of course, Toomey…in case you didn’t get that.)
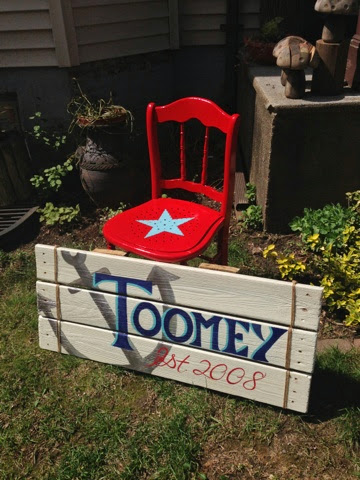
Her most recent request to “Toomey a Favor” was one of my favorite projects of the Summer so far. Her family has a little lake house with a dock that needed replacing and when the old dock was torn up, Danielle, never one to miss out on a project, saved some of the weathered chunks of it and brought them to me. And they are awesome!
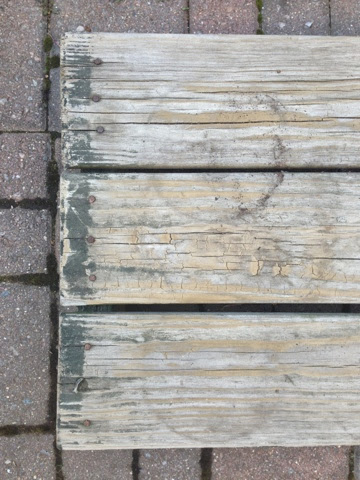


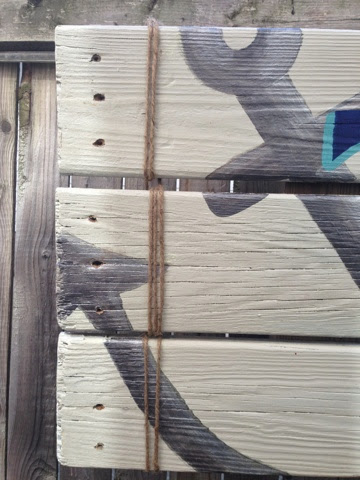
They are perfect and raw and full of stories never told. I wanted to keep the integrity of the wood but make it more weather-resistant so I whitewashed the front planks and secured them together with some twine to add to the just-off-the-boat, nautical look of it. Then I painted a gigantic anchor on it, symbolizing the Toomey family’s anchoring down and establishing roots, their name & wedding date and I’m really happy with the results.


Now I just need to figure out the perfect thing to paint on my section of the dock. Maybe something in a giant serpent lady with wings and an American flag halter top? You know, something classy. Ideas welcomed.


